Introduction
White spots on cannabis plants are a significant challenge for growers in 2024. These unique marks can indicate various underlying problems that directly affect your plant’s health and potential yield. From pest infestations to nutrient deficiencies, the appearance of white spots requires immediate attention and proper diagnosis.
As cannabis cultivation continues to evolve, growers face increasing pressure to keep their plants healthy while maximizing production. White spots can show up at any stage of growth, impacting both indoor and outdoor operations. These spots often act as early warning signs of:
- Pest issues like spider mites or whiteflies
- Nutritional imbalances involving calcium or magnesium
- Environmental stress from excessive light or heat
- Fungal infections such as powdery mildew
Understanding these signs is crucial for successful cannabis cultivation. Each cause needs specific treatment methods, making accurate identification vital for effective remediation. A misdiagnosed problem can lead to wrong treatments, wasting time and resources while potentially harming your plants.
The key to keeping your cannabis plants healthy is spotting these symptoms early and applying the right solutions. This guide offers you detailed information on how to identify, treat, and prevent white spots on your cannabis plants, ensuring optimal growth and yield for your 2024 cultivation efforts.
Identifying White Spots on Cannabis Leaves
White spots on cannabis leaves are distinct discolorations that can significantly impact plant health. These spots appear in various patterns and sizes, each indicating a specific underlying issue. Learning to identify these patterns is crucial for accurate diagnosis and treatment.
Key Characteristics to Observe
- Spot Location
- Upper leaves only
- Lower leaves primarily
- Throughout the entire plant
- Concentrated on specific sections
- Spot Patterns
- Scattered individual dots
- Clustered formations
- Streak-like patterns
- Circular patches
Visual Indicators
- Texture Changes
- Powdery residue
- Raised bumps
- Sunken areas
- Dry, papery spots
- Associated Symptoms
- Leaf curling
- Yellowing around spots
- Leaf tissue death
- Growth deformities
Time of Appearance
- Vegetative Stage
- Usually indicates pest problems
- Nutrient absorption issues
- Environmental stress
- Flowering Stage
- Often related to humidity
- Light stress concerns
- Calcium mobility problems
Understanding these visual cues helps you determine whether you’re dealing with a pest infestation, nutrient deficiency, environmental stress, or disease. The pattern, location, and timing of white spots are essential diagnostic tools for maintaining plant health.
Common Causes of White Spots:
1. Pest Infestations
- Spider mites create tiny white specks and webbing
- Whiteflies leave scattered white dots on leaf surfaces
- Thrips cause silvery-white streaks and patches
2. Nutritional Deficiencies
- Calcium deficiency: White spots between leaf veins
- Magnesium shortage: White patches starting from leaf edges
- Zinc issues: Small white spots with stunted growth
3. Environmental Stress
- Light burn: Bleached white areas on upper leaves
- Heat stress: White blotches with upward curling edges
- High humidity: Powdery white patches
Visual Inspection Guide:
- Use a magnifying glass to examine spots closely
- Check leaf undersides for pest activity
- Document spot patterns and progression
- Note which leaves are affected (new vs. old growth)
- Examine growing conditions and recent changes
Key Diagnostic Indicators:
- Pest damage: Look for movement, eggs, or webbing
- Nutrient issues: Check for symmetrical patterns across leaves
- Environmental stress: Observe proximity to light sources and temperature variations
Location Patterns:
- Upper leaves: Light or heat stress likely
- Lower leaves: Nutrient deficiencies common
- Random distribution: Possible pest infestation
- Systematic spread: Environmental factors or disease
Accurate identification requires careful observation of spot characteristics, plant symptoms, and growing conditions. These visual clues help determine appropriate treatment strategies for your cannabis plants.
1. Pest Infestations
Pest infestations represent a significant threat to cannabis plants, with several species known to create distinctive white spots on leaves. Here’s what you need to know about the most common culprits:
Spider Mites
- Leaves develop tiny white or yellow speckles
- Damage appears as clusters of small dots
- Web-like structures between leaves and branches
- Spots start on the underside of leaves
- Rapid reproduction can devastate crops within days
Thrips
- Silvery-white streaks or patches on leaves
- Distinctive scratch-like markings
- Black dots (feces) near damaged areas
- Leaves become brittle and papery
- Primarily attack new growth
Whiteflies
- Circular white spots on upper leaf surfaces
- Sticky residue (honeydew) on leaves
- Spots appear randomly distributed
- Yellow rings around feeding sites
- Insects visible on leaf undersides
Visual Identification Tips:
- Use a magnifying glass to inspect leaf undersides
- Shake affected branches over white paper to spot falling pests
- Look for pest activity during early morning or late evening
- Check for signs of eggs near damaged areas
- Monitor new growth for early infestation signs
These pests multiply rapidly in warm, dry conditions. Spider mites thrive at temperatures between 68-82°F (20-28°C), while thrips and whiteflies prefer slightly warmer environments. Regular inspection of your plants helps catch infestations early, particularly in areas with poor air circulation or high humidity.
Pest damage patterns often start in isolated areas before spreading throughout the plant. Recognizing these early warning signs allows for targeted treatment before the infestation becomes severe.
2. Nutritional Deficiencies
Nutrient deficiencies create distinct patterns of white spots on cannabis leaves, each telling a specific story about your plant’s health. Understanding these patterns helps you identify and correct issues before they impact your yield.
Calcium Deficiency Signs:
- White spots between leaf veins
- Brown spots on new growth
- Stunted root development
- Weak stems prone to breaking
- Leaf tips dying and curling inward
Magnesium Deficiency Indicators:
- Yellowing between leaf veins
- White patches on older leaves first
- Leaf edges turning upward
- Progressive spread from bottom to top
- Leaves becoming brittle and crispy
Your cannabis plants need precise nutrient ratios for optimal growth. Too much fertilizer leads to nutrient burn, creating:
- Leaf tips turning brown and crispy
- White crystalline deposits on soil
- Yellowing leaves with burnt edges
- Nutrient lockout preventing absorption
pH Imbalance Effects:
- Ideal soil pH range: 6.0-7.0
- Hydroponic pH range: 5.5-6.5
- Outside these ranges, nutrients become unavailable
- White spots appear as deficiency symptoms
Prevention Tips:
- Use quality nutrients designed for cannabis
- Test pH levels regularly
- Start with 1/4 strength nutrients
- Increase gradually based on plant response
- Flush systems every 2-3 weeks
The key to preventing nutrient-related white spots lies in maintaining proper pH levels and using balanced fertilizers. Your plants will show early warning signs through leaf discoloration and growth patterns. Regular monitoring of nutrient levels helps catch issues before white spots develop into severe deficiencies.
3. Environmental Factors
Light burn and heat stress create distinct patterns of white spots on cannabis leaves, signaling environmental imbalances in your grow space.
Light Burn Symptoms:
- Bleached white patches on upper leaves closest to light sources
- Crispy, papery leaf texture
- Discoloration concentrated at leaf tips
- Upward-curling leaves trying to escape intense light
The distance between your grow lights and plant canopy plays a critical role in preventing light burn. LED and HID lights require specific positioning:
- LED lights: 18-24 inches from canopy
- HID lights: 24-30 inches from canopy
Heat Stress Indicators:
- White or yellow blotches appearing randomly across leaves
- Leaves turning upward like tacos
- Dry, brittle leaf edges
- Accelerated leaf death in affected areas
Your cannabis plants thrive within specific temperature ranges:
- Vegetative stage: 70-85°F (21-29°C)
- Flowering stage: 65-80°F (18-27°C)
Environmental Control Solutions:
- Install oscillating fans for proper air circulation
- Use temperature controllers with automated ventilation
- Add shade cloth during peak light hours
- Position intake and exhaust fans strategically
The relationship between light intensity and temperature requires constant monitoring. High-powered grow lights generate significant heat, creating a compound effect on your plants. A slight adjustment in light height can trigger temperature changes of 5-10 degrees at the canopy level.
Light Stress Prevention:
- Implement light schedules with gradual intensity increases
- Rotate plants regularly for even exposure
- Monitor leaf surface temperature with infrared thermometers
- Create light diffusion using semi-transparent screens
These environmental factors often work together, making identification of the specific cause challenging. White spots appearing during peak light hours typically indicate a combination of light and heat stress rather than a single factor.
Remedies for Managing White Spots on Cannabis Plants
Treating white spots requires a targeted approach based on the specific cause. Here’s how to address each issue effectively:
Pest Control Solutions
Natural Remedies:
- Mix 2 tablespoons of neem oil with 1 gallon of water for a potent organic pesticide
- Apply diluted castile soap solution (1 tablespoon per quart of water) to affected areas
- Introduce beneficial insects like ladybugs to combat spider mites
- Use sticky traps to capture whiteflies and monitor pest populations
Chemical Solutions:
- Pyrethrin-based insecticides for severe infestations
- Insecticidal soaps for mild to moderate pest problems
- Spinosad products for thrips control
Nutrient Management
pH Balance Optimization:
- Maintain soil pH between 6.0-7.0
- Test pH levels weekly using digital meters
- Adjust water pH before feeding using pH up/down solutions
Deficiency Corrections:
- Add calcium-magnesium supplements for white spot prevention
- Use complete nutrient solutions with micronutrients
- Apply foliar sprays for quick nutrient absorption
Application Tips
Pest Treatment Application:
- Spray solutions during early morning or late evening
- Cover both top and bottom leaf surfaces
- Repeat treatments every 3-5 days until pests are eliminated
- Maintain consistent temperature during application (65-75°F)
Nutrient Solution Application:
- Start with 1/4 strength solutions
- Increase concentration gradually based on plant response
- Water plants thoroughly before applying nutrients
- Monitor leaf response for 24-48 hours after treatment
Remember to isolate affected plants during treatment to prevent spread and maintain detailed records of all applications for future reference. Regular monitoring helps adjust treatment intensity and frequency based on plant response.
Environmental Management Strategies Against White Spots
Proper environmental control plays a critical role in preventing white spots on cannabis plants. A well-managed growing environment creates resilient plants that naturally resist common issues.
1. Light Management
- Position grow lights 18-24 inches from plant canopy
- Use light meters to maintain optimal intensity (400-600 PPFD for vegetative stage)
- Install adjustable light fixtures for height control
- Implement light movers to distribute light evenly
- Add diffusion screens for harsh light sources
2. Temperature Control
- Maintain temperatures between 70-85°F (21-29°C)
- Install oscillating fans for air movement
- Use environmental controllers to monitor temperature
- Create temperature zones with proper spacing
- Add cooling systems for high-intensity lighting setups
3. Ventilation Requirements
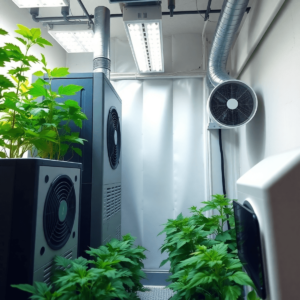
Proper ventilation is crucial for maintaining healthy cannabis plants and preventing moisture-related issues. Here’s a comprehensive breakdown of essential ventilation components:
Air Movement Systems
- Install commercial-grade intake fans at floor level
- Position exhaust fans near ceiling for heat extraction
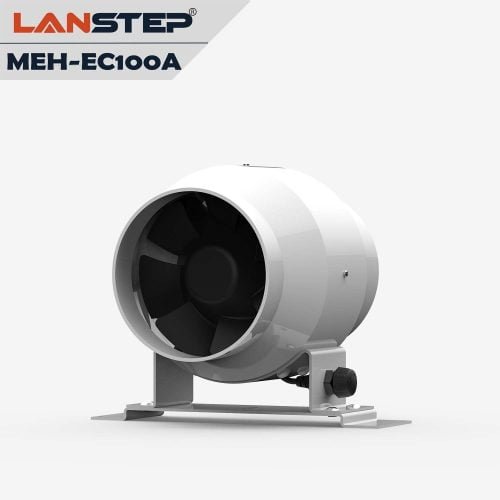
- Implement inline duct fans for targeted air movement; use inline fans to ensure efficient air exchange
- Set up oscillating wall-mounted fans for canopy circulation
Air Exchange Calculations
- Calculate room volume (length x width x height)
- Maintain minimum 4x hourly air exchange rate
- Increase to 6x exchange rate during flowering
- Account for equipment heat load in calculations
Strategic Fan Placement
- Position intake fans opposite exhaust systems
- Create diagonal airflow patterns across grow space
- Install circulation fans every 50-75 square feet
- Maintain 2-3 feet clearance around major fan units
Air Quality Control
- Use activated carbon filters for odor management
- Install HEPA filters for airborne pathogens
- Replace filter media every 6-8 months
- Monitor filter pressure drops for efficiency
Humidity Management
- Maintain 45-55% RH during vegetative growth
- Reduce to 40-45% RH during flowering
- Install humidity sensors at plant level
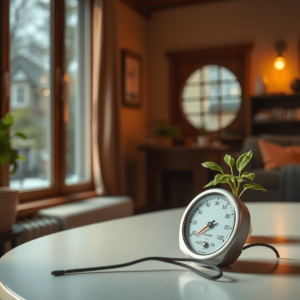
- Use hygrometers with data logging capability
- Implement dehumidification systems for precise control
Airflow Monitoring
- Use anemometers to measure air velocity
- Check for dead spots with smoke tests
- Monitor leaf movement as airflow indicator
- Adjust fan speeds based on growth stage
4. Advimageanced Environmental Controls
- Set up automated climate control systems
- Install humidity sensors at multiple height levels
- Create microclimates for different growth stages
- Use dehumidifiers during dark periods
- Implement CO2 enrichment with proper ventilation
5. Room Configuration
- Design proper spacing between plants
- Create dedicated zones for different growth stages
- Install reflective walls for light distribution
- Set up proper drainage systems
- Use raised platforms for better air circulation
These environmental controls work together to create optimal growing conditions. Your cannabis plants develop stronger resistance to white spots when grown in properly managed environments with consistent temperature, appropriate lighting, and adequate ventilation.
Preventative Measures Against White Spots in Cannabis Cultivation
Creating ideal growing conditions serves as your first line of defense against white spots. A proactive approach to plant health management can save you significant time and resources.
Essential Preventative Practices:
1. Humidity Control
Optimal Humidity Ranges
- Maintain 40-60% humidity during vegetative stage
- Reduce to 30-40% during flowering phase
- Keep mothers at 45-55% for healthy cloning
- Drop levels by 5% each week during late flowering
Equipment Setup
- Install humidity monitors at plant level
- Place secondary sensors at canopy height
- Mount dehumidifiers away from direct airflow
- Position hygrometers in multiple room zones
Daily Management
- Check readings twice daily (lights on/off)
- Record humidity fluctuations in grow diary
- Adjust levels before significant spikes occur
- Monitor leaf transpiration rates
Dehumidification Strategy
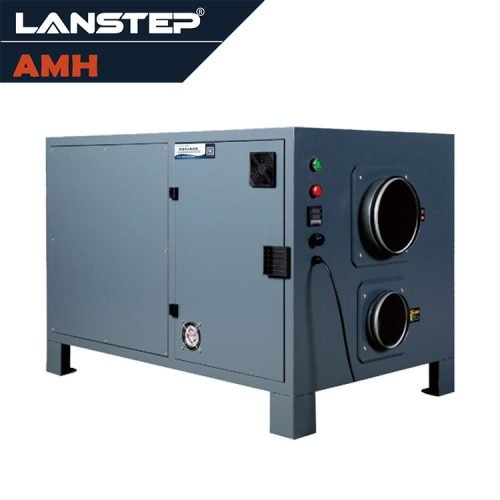
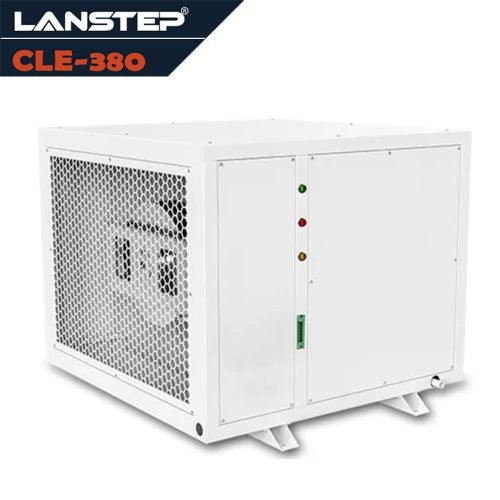
To maintain optimal humidity levels, using commercial-grade dehumidifiers is recommended. For enclosed spaces, you might consider the desiccant dehumidifier or the cropdry max grow room dehumidifiers. Regular maintenance such as emptying collection tanks and cleaning filters monthly is crucial. Installing drainage systems for continuous operation and calculating dehumidifier capacity based on room size are also key steps.
Environmental Interaction
It’s vital to coordinate humidity with temperature control. This includes adjusting the watering schedule to maintain proper levels and considering seasonal humidity variations. Monitoring external weather impacts on indoor environment is also essential.
- For more efficient ventilation systems, exploring options like inline duct fans could be beneficial. These fans not only help in maintaining optimal humidity but also improve air circulation, which is crucial for plant health.

2. Plant Spacing
- Allow 2-3 feet between mature plants
- Prune unnecessary foliage
- Remove dead leaves promptly
- Ensure proper air circulation between plants
3. Regular Inspection Protocol
- Check leaves daily for discoloration
- Examine both top and bottom leaf surfaces
- Use magnifying glass for detailed inspection
- Document any changes in plant appearance
Sanitation Guidelines:
- Clean growing area weekly
- Sterilize tools between uses
- Wash hands before handling plants
- Use clean water sources
- Keep floors and walls free from debris
- Maintain optimal humidity levels in your grow space by using a high-efficiency dehumidifier designed for grow rooms.
Quarantine Procedures:
- Isolate new plants for 14 days
- Check for signs of pests or disease
- Treat preventatively with neem oil
- Monitor quarantined plants daily
Environmental Monitoring:
In addition to the above measures, it’s crucial to track temperature fluctuations, record humidity levels, monitor pH levels weekly, test water quality monthly, and check soil moisture consistently.
Creating a maintenance schedule helps systematize these preventative measures. Your growing space requires consistent attention to maintain optimal conditions. Regular monitoring allows you to spot potential issues before they develop into serious problems affecting your entire crop.
Other Growth Challenges Related to White Spots in Cannabis Plants
White spots on cannabis plants often signal deeper cultivation issues that manifest through additional symptoms. Understanding these interconnected problems helps growers maintain healthy plants and maximize yields.
Common Secondary Symptoms:
- Leaf Yellowing (Chlorosis)
- Appears alongside white spots during nutrient deficiencies
- Starts from leaf margins, spreading inward
- Indicates potential magnesium or calcium issues
- Curling Leaves
- Upward curling suggests heat stress
- Downward curling points to overwatering
- Both conditions can worsen white spot symptoms
Growth Impact:
- Vegetative Stage Effects
- Stunted growth in affected areas
- Reduced photosynthesis capacity
- Weakened stem development
- Delayed transition to flowering
- Flowering Stage Complications
- Reduced bud density
- Lower trichome production
- Diminished potency
- Decreased final yield
Plant Health Indicators:
- Slow Growth
- Structural Changes
Plants experiencing multiple symptoms require careful monitoring of environmental conditions, nutrient levels, and watering schedules. The relationship between white spots and secondary symptoms often points to systemic issues in the growing environment.
Economic Implications of Plant Health Issues in Cannabis Cultivation
White spots on cannabis plants create significant financial challenges for cultivators. Untreated plant health issues directly impact your bottom line through:
- Reduced Market Value: Plants affected by white spots produce lower-quality buds, forcing sales at discounted prices
- Lost Inventory: Severe cases require disposal of infected plants, resulting in complete revenue loss
- Treatment Costs: Reactive measures like pesticides and fungicides add unexpected expenses
- Labor Expenses: Additional staff hours needed for plant maintenance and treatment
Cost-Effective Prevention Strategies:
1. Regular Plant Inspections
- Daily visual checks
- Early detection reduces treatment costs
- Minimal time investment for maximum protection
2. Environmental Control Systems
- Automated humidity monitors
- Temperature control equipment
- Initial investment saves long-term treatment costs
3. Staff Training Programs
- Proper handling techniques
- Disease identification skills
- Prevention-focused protocols
ROI Analysis:
A healthy cannabis crop yields 20-30% higher returns compared to plants compromised by white spots. Professional cultivators report spending $2-3 per plant on preventive measures saves $15-20 per plant in potential losses.
Implementing proactive health management strategies protects your investment and maintains consistent crop quality. These practices stabilize your revenue stream and build a reliable reputation in the competitive cannabis market.
Conclusion
White spots on cannabis plants are a significant problem that requires immediate attention and proper management. Your success in growing cannabis depends on your ability to identify, treat, and prevent these issues effectively.
The key to keeping your cannabis plants healthy is:
- Regular Monitoring: Daily inspections help catch white spots early
- Swift Response: Immediate action prevents spread and minimizes damage
- Proper Environment: Maintaining optimal growing conditions reduces stress
- Balanced Nutrition: Correct nutrient levels prevent deficiencies
- Pest Management: Implementing effective pest control strategies
Your proactive approach to plant health management directly impacts your cultivation success. By implementing the strategies outlined in this guide, you’ll create resilient plants that yield high-quality harvests.
Remember these essential practices:
- Keep detailed growth records
- Test pH levels regularly
- Monitor temperature and humidity
- Maintain proper ventilation
- Practice strict hygiene protocols
The world of cannabis cultivation continues to change in 2024, bringing new challenges and solutions. Your commitment to understanding and addressing white spots ensures your plants thrive in any growing environment. Take action today – your cannabis plants deserve nothing less than optimal care and attention.
FAQs (Frequently Asked Questions)
What are the common causes of white spots on cannabis leaves?
White spots on cannabis leaves can be caused by pest infestations, nutritional deficiencies, and environmental stressors. Common pests include spider mites and whiteflies, while nutritional deficiencies often involve calcium and magnesium. Environmental factors such as light burn and heat stress can also contribute to the appearance of white spots.
How can I identify if my cannabis plants are suffering from pest infestations?
To identify pest infestations, visually inspect your cannabis plants for signs of damage. Look for webbing, discolored leaves, or tiny insects on the undersides of leaves. Specific pests like spider mites may cause stippling or yellowing around the white spots.
What remedies can I use to manage white spots caused by pests?
Effective treatments for managing pest infestations include using insecticides or natural remedies like neem oil. Ensure you follow proper application methods and timings to maximize their effectiveness while minimizing harm to the plant.
How do nutritional deficiencies manifest as white spots on cannabis plants?
Nutritional deficiencies can lead to white spots on cannabis leaves due to insufficient calcium or magnesium. Over-fertilization may also cause nutrient burn, resulting in similar symptoms. Regularly monitoring nutrient levels and adjusting solutions can help prevent these issues.
What environmental factors should I manage to prevent white spots on my cannabis plants?
To prevent white spots, manage light exposure by controlling intensity and duration, and ensure proper ventilation to regulate temperature. Avoid excessive heat stress by providing adequate airflow in the growing area.
What preventative measures can I take against white spots in cannabis cultivation?
Maintain optimal growing conditions by controlling humidity and ensuring proper spacing between plants. Conduct routine inspections for early detection of problems, which is crucial for preventing the development of white spots and other related issues.

